New content / training menu
These are the options available when you create a new content or training, click on any of the links to learn more about them.
Separation between Contents and Trainings
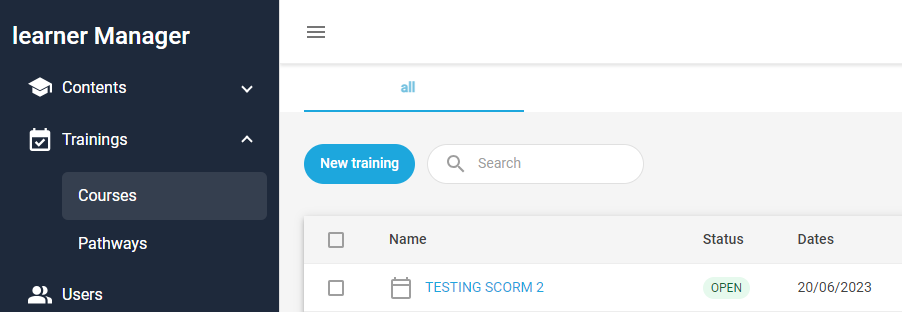
Remember that the LMS Admin interface separates the Contents (Courses and Pathways) from the Trainings. This simplifies the navigation of the different user roles, with Authors having access to the Content and Group Administrators to the Trainings.

To create a new training on a content already published, in the Trainings section access to the type of content you want: Courses, Events, Pathways or Learning programs. Click the New training button at the top right, and within the Details menu select the content to which it will be assigned.
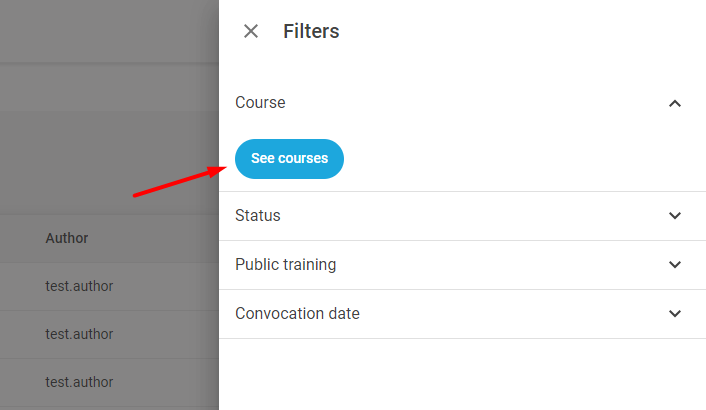
So, how can I see all the Trainings associated with a specific Content? From the same Trainings list, using one of the available Search filters, specifically Course or Pathway.

Clicking on View courses / View Pathways displays a list with all the available contents. Select the one you want and click on the buttons Save and Apply filters.

New content details tab
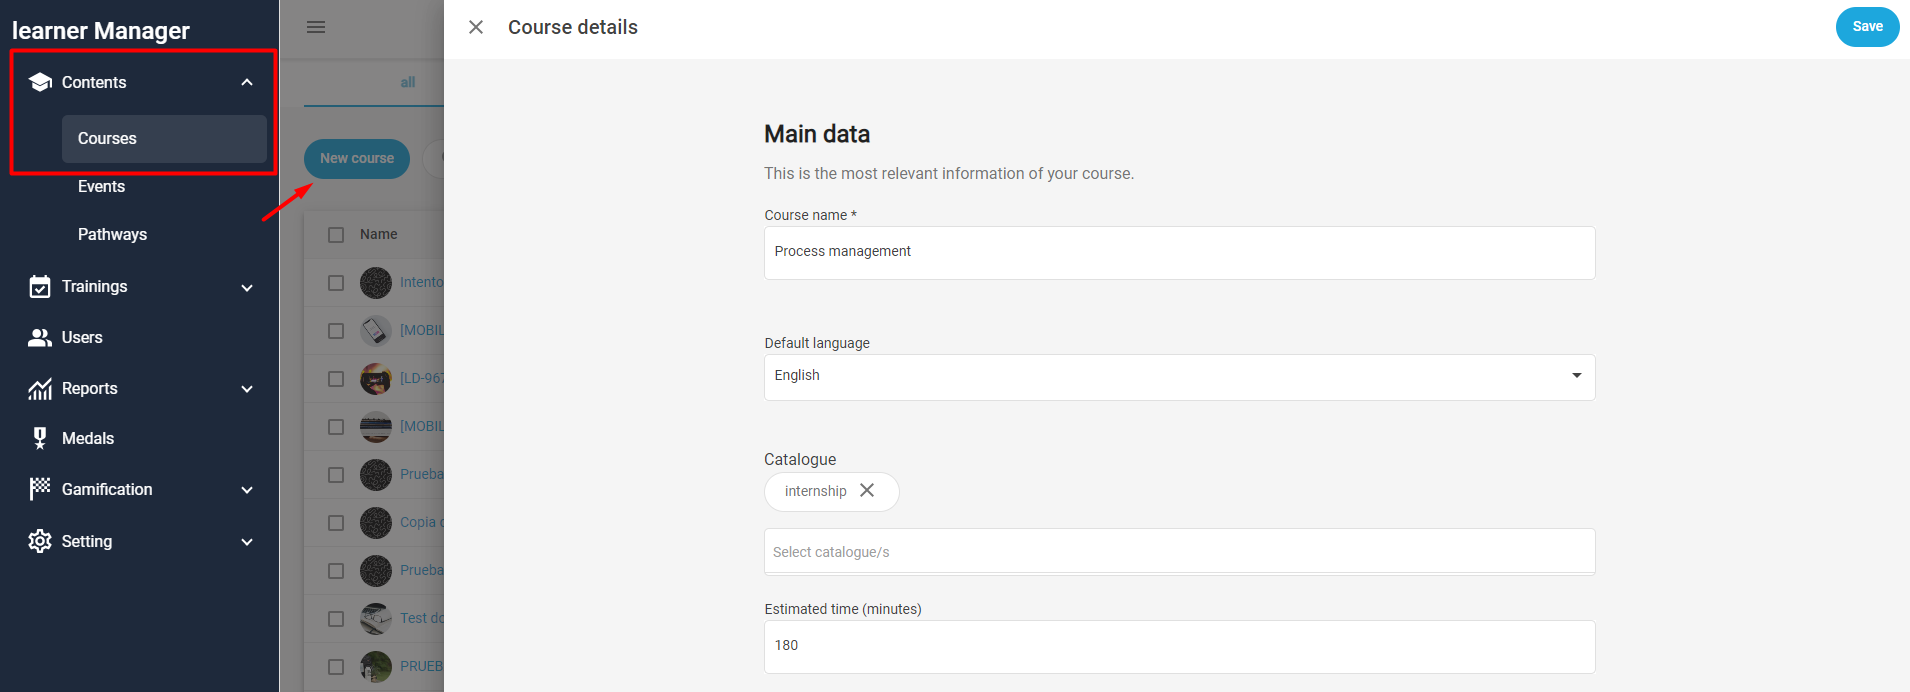
The options for creating new content are similar for all four types. For example, to create a new Course:

-
Main data, enter here the basics of the course:
- Course name, remember that it is this title, and not the one of the Training, which will be shown to the student in the course at the LMS
- Default language, mandatory field, it is important to select the correct one if you are going to work with Multi-language
- Catalogue, to share the content through the same Organization
- Estimated time, you can add an estimate in minutes of how long it will take to complete the course
-
Assessment, to specify a minimum cut-off score to successfully complete the course. Remember to gamify the Activities to award points to the student
-
Awards, to give badges to the student for completing the course
-
Assistant, activate this option if you want the AI assistant to have access to the course content, and use it for its answers and recommendations
-
Marketing, further customize the course with these features:
-
Gamification, if you want to reward the student:
-
Extended fields, you can add other custom fields, through the option available at the Setting
In addition, to create a new event you will find the option Documentation, which allows us to add attached files (documents, videos, audios) as support material for the student.
Remember to click on the Save button at the end to create the course, pathway or training.
New training details tab
To create a new Training, the options are also similar for all four content types. For example, for the training for a course:

-
Main data, enter the basic data of the training here:
- Training name, for internal use, will not be displayed in the LMS
- Course, displays a new menu where you select the content associated to the training
- Trainers, you can use this option to assign users with the Trainer role
- Dates, the start date is mandatory, although it can be for later (planned). If no end date is selected, the training will remain open until it is manually closed
- Select certificate, to award a diploma to the student upon completion of the training
-
Training options, some options for configuring access:
- Public training, to show the training as suggested to all students on the platform, in the Recommended carousel
- Permanent access to content, if deactivated, once the student completes the course he will not be able to access it again to consult the content
-
Communication, to manage the training alerts:
- Pending access reminder, send a notification if X days have passed from the start of the training and the user did not access the content yet
- Notice before the start, send a notification when there are X days left for the start of the training
- Reminder of the end, send a notification if the user has not completed the content and there are X days left until the end of the training
-
Marketing, further customize the training with these features:
- Highlighted, to display this content in the main carousel at the top of the LMS
- Carousels, apart from the carousels that work by default (Featured, Recommended...) you can create customized carousels, and you will use this option to assign them content
-
Social, options related to communication and feedback between students:
In addition, for the training of an event you will find the options:
-
Location and dates, to locate the event:
- Location, if the event is in person you can enter the physical address
- Virtual room, if the event is online you can enter the URL address
-
Enrollment, to manage the registration of users:
- Maximum capacity, if the event has a capacity limit, activate this option and specify the number in the box
- Automatic seat reservation, with this option activated students will be able to join a waiting list in case the event is full